LEDress Instruction Sheet....Copyright 2005-2016 The Logician, LLC
Visit the Website at www.ledress.com to see photos of wiring, mounting, and jumper settings. If you ordered wiring or mounting kits, find these items inside the LEDress or the transformer box.
Black enclosures should not be installed in direct hot sun.
The LEDress has two display modes. The display can be night on (lighted from dusk to dawn and off during the day), or always on. These modes are set using the jumper on a circuit board inside the LEDress. Do this first so the LEDress doesn't have to be taken down after mounting. Slide the backpanel open to expose the jumper. The two jumper settings are:
> Dusk-to-dawn lighted, (set the jumper back towards the backpanel)
> Always lighted, (set the jumper forward towards the display digits)
The photo-transistor window in the enclosure bottom needs an inch or so of free space to see daylight.
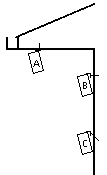
Mounting the LEDress will be simplest by using various small metal angles and braces available at hardware stores. These pieces already have holes in them, and the LEDress enclosure screws can be used to attach them to the LEDress, leaving the free holes for mounting to a wall or eave. Use a flat metal piece for eave mounting, or a right-angle piece for wall mounting. Warning: Do not remove both top or both bottom enclosure screws, the digits may pop out of their slots. Just do one corner at a time. If the digits untrack, unscrew one side of the enclosure and also remove the internal circuit board. Then slide the digits in from the side and re-assemble. The LEDress can be mounted by other means, but don't drill into the circuit boards inside! The backpanel is intended to slide in both directions (or just downward on vertical units) to expose both the wiring terminals and the display mode jumper. If possible, locate the LEDress so that a small hole can be drilled in the wall directly behind it to route wire. Once the LEDress is mounted, it may need to be tilted downward to reduce bright sky or building reflections on the front bezel when the display is viewed from the street. An elevated yard will also require some display tilting. This is best done by slightly loosening the screws that attach the metal pieces to the house; then the display will naturally tilt downward.
Do not wire the display directly to 120 VAC, it will not work!! LEDress is powered by low voltage and wiring to it is not a hazard. The wiring process is best done starting at the LEDress location and running the wire indoors to the wall transformer wires. To power the LEDress, it is likely the transformer wires will need to be extended. The mounting site is probably distant from an electrical outlet. Use a gauge of wire similar to the transformer's for the extension. Small-gauge speaker wire or alarm wire is fine. Drill a small hole in the center of the backpanel and feed the end of the extension wire through the hole and inside the enclosure. Feed plenty of wire inside so that if you need to make a future change, the LEDress can be unmounted, the excess wire pulled outside the backpanel hole, and the display turned around so you can access the backpanel. Remember that the wire indoors will likely be stapled down to walls and can't provide any slack on the outdoors side. Remove 1/4" of insulation from the separated extension wires and insert them in the wire receptacles on top of the circuit board terminal block and tighten the terminal screws. Tug the wire end a bit to make sure the connection is solid. Determine the best route to run the LEDress power wires. Wire nut the two transformer wires to the extension wires, all having 1/2" of insulation removed. You are set--now plug in the transformer!
If water or snowmelt can get inside the LEDress through any hole you drill for mounting or wiring, please caulk those holes. Water can actually run down the wire and drip inside if exposed directly to rain or caked snow.


